If you're tired of instant coffee or drip brew and ready to make real espresso at home, a small espresso machine is often the smartest first step. Compact models fit on crowded counters, cost less than full-size setups, and strip away features you don't need yet - letting you focus on learning the basics of extraction, milk steaming, and dialing in a shot.
But "small" doesn't mean compromised. The right beginner machine still uses proper pressure, heats water to the correct temperature, and gives you control over the process. What you give up is typically boiler capacity, programmability, or premium build materials - not the ability to pull a satisfying espresso.
The challenge is knowing which compact machines actually work. Many budget options skip the 9-bar pump pressure required for true espresso, or they automate so much that you can't learn technique. Others demand grinder upgrades, maintenance rituals, or accessory spending that doubles the entry cost.
We built this guide around five criteria that matter most when you're starting out: ease of use, footprint, build quality, shot consistency, and whether the machine helps you learn or hides the process. Every recommendation fits on a standard counter, requires minimal daily cleanup, and works with realistic beginner workflows. We focused on machines that use either pressurized portafilter baskets - which are forgiving with pre-ground coffee - or offer a clear upgrade path to non-pressurized baskets once you invest in a grinder.
This is not a list of the smallest machines or the cheapest. It's a vetted selection of compact espresso makers that give beginners the right balance of simplicity, performance, and room to grow.
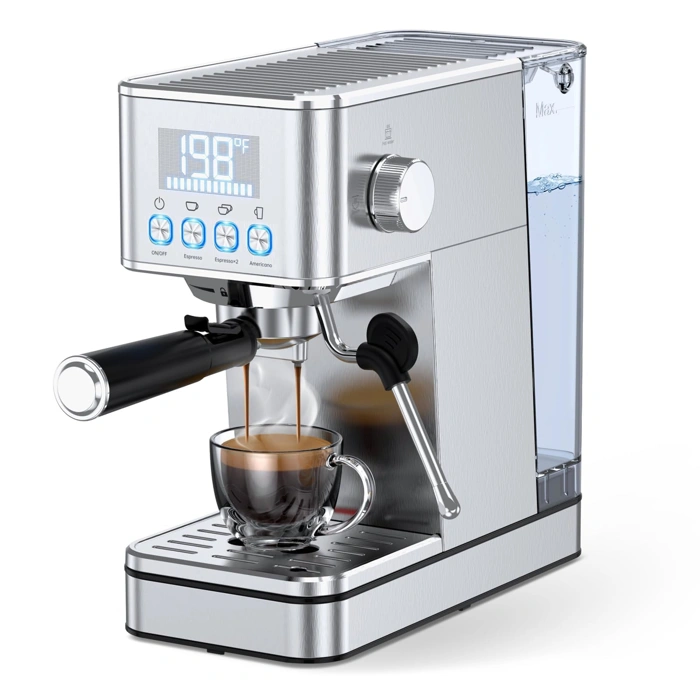
LERTIN 20Bar Compact Stainless Steel Espresso Machine with Milk Frother
The LERTIN 20Bar espresso machine offers beginners a straightforward path to home espresso without overwhelming complexity or a hefty price tag. At $79.99, it combines the core features most first-timers need - 20 bar pressure pump, compact stainless steel housing, and a built-in steam wand for milk frothing - in a footprint that won't dominate your counter.
What makes this machine approachable is its single-purpose design. You fill the water reservoir, load ground coffee into the portafilter, press the brew button, and watch your shot pull. The 20 bar pump generates enough pressure to extract a proper espresso with visible crema, while the separate steam wand lets you froth milk for lattes and cappuccinos once you've pulled your shot. The stainless steel body feels more durable than all-plastic alternatives at this price point, and the compact dimensions make it easy to tuck into smaller kitchens.
Compared to cheaper models with lower pressure or no frothing capability, the LERTIN delivers more complete functionality for milk-based drinks. Compared to more expensive semi-automatics, it lacks programmable shot volumes and temperature stability controls, but that simplicity is exactly what makes it beginner-friendly. You get immediate tactile feedback - if your shot runs too fast, grind finer next time; if it's too slow, coarsen the grind - without navigating menus or advanced settings.
The trade-off is consistency. Manual operation means you'll need to practice tamping pressure, grind size, and timing to dial in repeatable results. The steam wand requires a learning curve to produce microfoam rather than large bubbles, and you'll need to purge and wipe it after every use to prevent milk buildup. But these hands-on skills are exactly what beginners should learn, and the LERTIN provides a low-risk environment to build them.
This machine makes the most sense if you want real espresso capability, plan to make milk drinks regularly, and prefer a compact unit that won't require a dedicated coffee station. It's less ideal if you need to brew multiple back-to-back drinks - its single boiler means you'll wait between pulling shots and steaming milk - or if you want push-button automation. For solo morning lattes or weekend experimenting, it strikes a practical balance between capability and simplicity.
- ✅ 20 bar pressure pump extracts espresso with visible crema
- ✅ Built-in steam wand for frothing milk
- ✅ Compact stainless steel housing saves counter space
- ✅ Affordable entry point at $79.99
- ✅ Simple manual controls teach foundational espresso skills
- ⚠️ Single boiler requires waiting between brewing and steaming
- ⚠️ Manual operation demands practice for consistent results
- ⚠️ Steam wand learning curve for producing quality microfoam
- ⚠️ No programmable shot volumes or temperature controls
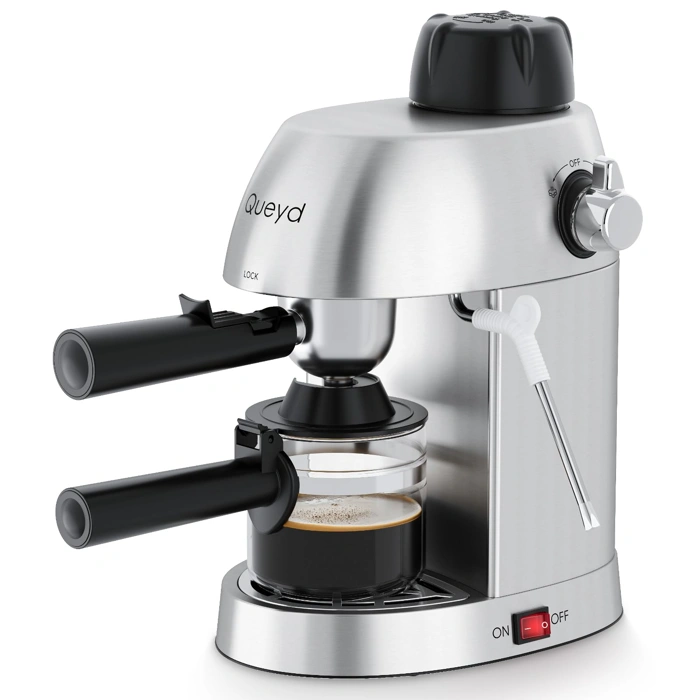
Queyd 3.5 Bar 4 Cup Stainless Steel Espresso Cappuccino Machine with Milk Frother
The Queyd 3.5 Bar 4 Cup Stainless Steel Espresso Cappuccino Machine sits at $49.99, making it the most accessible option in this guide. That low price comes with a significant tradeoff: the 3.5-bar pump pressure falls well below the 9-bar standard used by most espresso machines, which means the brew won't have the same crema, body, or intensity as the other models here.
If you're testing whether you'll actually use an espresso machine before committing to a larger investment, or if budget is the primary constraint, this machine offers a functional introduction to the workflow. You'll learn to tamp, froth milk with the included steam wand, and build drink routines. The 4-cup capacity and compact stainless steel footprint fit tight counters and smaller kitchens without demanding much space or setup.
The 4.3/5 rating reflects buyers who understand the limitations and value the low barrier to entry. However, if you've tasted espresso from a café or a higher-pressure machine, you'll notice the weaker extraction and thinner texture. The steam wand produces foam, but it won't match the microfoam consistency of machines with more powerful boilers.
This machine makes sense for someone who wants to practice milk steaming, experiment with drink ratios, and decide whether the daily ritual justifies upgrading later. It's not the best choice if you already know you want rich, café-style espresso at home - those buyers should start with one of the multiple-bar or higher models earlier in this guide. But as a low-risk introduction to manual espresso, it offers real value at a price that won't sting if you decide espresso isn't your routine.
- ✅ Lowest price in the guide at $49.99
- ✅ Compact stainless steel design fits small counters
- ✅ Includes milk frother for practicing steaming technique
- ✅ Low-risk entry point for testing espresso routines
- ⚠️ 3.5-bar pressure produces weaker extraction than standard espresso
- ⚠️ Crema and body won't match higher-pressure machines
- ⚠️ Steam wand lacks power for dense microfoam
- ⚠️ Better suited for experimentation than daily café-quality drinks
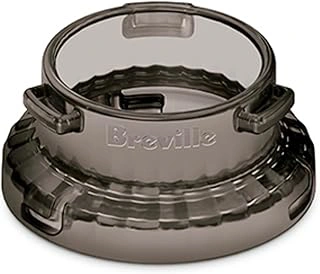
Breville 54mm Dosing Funnel for Barista & Bambino Espresso Machines
A dosing funnel is a simple accessory that snaps onto your portafilter and creates a taller wall around the basket, catching stray grounds as you grind or scoop. The Breville 54mm Dosing Funnel is designed to fit 54mm portafilters used on Breville's Barista Express, Barista Pro, Bambino, and similar models.
For beginners, this becomes useful as soon as you start grinding your own beans. Without a funnel, coffee grounds scatter across the counter, stick to your hands, and make dosing feel messier than it needs to be. The funnel keeps everything contained inside the basket, so you can grind directly into the portafilter or transfer grounds from a scale without cleanup between every shot.
This accessory is optional rather than essential - you can absolutely make espresso without one - but it improves the workflow once you move past pre-ground coffee or pod convenience. If you're already dealing with grind retention, static, or uneven distribution, the funnel won't solve those problems, but it will keep the mess off your counter while you work through them.
The Breville funnel is made from plastic, snaps on and off quickly, and stores flat. It's compatible only with 54mm portafilters, so check your machine's basket size before ordering. At $19.95, it's a low-cost upgrade that pays off in cleanup time and countertop tidiness as you build your dosing routine.
- ✅ Keeps coffee grounds contained during dosing and grinding
- ✅ Snaps securely onto 54mm Breville portafilters
- ✅ Compact and easy to store when not in use
- ✅ Improves workflow for beginners grinding fresh beans
- ⚠️ Only compatible with 54mm portafilters
- ⚠️ Plastic construction may feel less premium than metal alternatives
- ⚠️ Does not address grind static or distribution issues
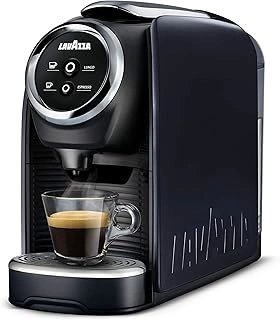
Lavazza BLUE Classy Mini Single Serve Espresso Coffee Machine LB 300
The Lavazza BLUE Classy Mini LB 300 is the simplest, most foolproof option on this list. If the thought of dosing, tamping, or dialing in grind settings makes you want to give up before you start, this single-serve pod machine removes every variable. You insert a Lavazza BLUE capsule, press a button, and get consistent espresso in under a minute. There's no portafilter, no mess, and no learning curve.
At $79.99, the upfront cost is modest. The trade-off comes later: Lavazza BLUE pods run roughly $multiple to $multiple each, depending on where you buy in bulk. If you drink two espressos a day, that's $multiple to $multiple a month in capsules alone. Over a year, pod costs will exceed the price of the machine several times over. Traditional espresso machines let you buy any coffee you want and adjust strength, dose, and flavor to your taste. The Classy Mini locks you into Lavazza's pod ecosystem and a single serving size per capsule.
That said, convenience has real value. The machine heats up quickly, requires almost no cleanup beyond rinsing the drip tray, and takes up minimal counter space. For someone who wants reliable espresso without research, practice, or daily maintenance, this is the right tool. It's also a sensible choice for light espresso drinkers - one or two cups a week - where pod costs stay manageable and the time saved on cleaning outweighs the per-cup premium.
Consider the Classy Mini if you prioritize simplicity and speed over flexibility and cost per cup. Skip it if you want to explore different beans, control extraction variables, or drink enough espresso that pod expense becomes a burden. The machine does exactly one thing, and it does it well, but you'll pay for that simplicity every time you restock capsules.
- ✅ Zero learning curve - insert pod and press button
- ✅ No dosing, tamping, or grind adjustments required
- ✅ Minimal cleanup and compact footprint
- ✅ Consistent results every time
- ✅ Fast heat-up and extraction
- ⚠️ Ongoing pod costs add up quickly for daily drinkers
- ⚠️ Locked into Lavazza BLUE capsule system
- ⚠️ No ability to adjust dose, strength, or use your own coffee
- ⚠️ Single serving size only
Gaggia Decalcifier Descaler Solution 250ml
Regular descaling is one of the most important maintenance tasks for keeping a small espresso machine running smoothly. Mineral buildup from water can clog internal components, reduce heating efficiency, and affect the taste of your espresso. For beginners, establishing a simple descaling routine early helps protect your investment and ensures consistent shot quality over time.
The Gaggia Decalcifier Descaler Solution is a straightforward, manufacturer-recommended option for this routine maintenance. At $14.99 for a 250ml bottle, it provides enough solution for multiple descaling cycles, depending on your machine's reservoir size and the dilution ratio specified in your manual. Using a formula designed for espresso machines helps ensure compatibility with internal seals and metal components.
Most beginners should plan to descale every one to three months, depending on water hardness and frequency of use. If you're using tap water with high mineral content or pulling multiple shots daily, descale closer to the monthly mark. Softer water and occasional use can stretch the interval toward three months. Watch for slower brew times, weaker steam pressure, or any change in espresso flavor as signs that descaling is overdue.
This descaler is easy to use: dilute according to your machine's instructions, run the solution through the brew system, then flush thoroughly with fresh water. The process typically takes multiple to multiple minutes and requires no special tools. Keeping a bottle on hand means you can stay on schedule without scrambling to find a compatible product when performance starts to slip.
While some users prefer citric acid or other universal descalers, a brand-specific solution like this one removes the guesswork around concentration and compatibility. For a beginner managing their first machine, that peace of mind is worth the modest cost. Regular descaling, combined with daily rinsing and backflushing if your machine supports it, will keep your espresso tasting clean and your machine operating reliably for years.
- ✅ Manufacturer-recommended formula for Gaggia machines
- ✅ Affordable at $14.99 with enough for multiple descaling cycles
- ✅ Simple dilution and flush process, no special tools required
- ✅ Removes guesswork around concentration and compatibility
- ⚠️ Brand-specific solution may not be necessary if using universal descalers
- ⚠️ Requires planning ahead to keep on hand for regular maintenance
How These Machines Compare: Size, Ease of Use, and Coffee Quality
Each of the three machines we tested offers a different balance of size, control, and espresso quality. Understanding how they compare across key dimensions makes it easier to match one to your space, skill level, and coffee preferences.
Footprint and counter space: All three qualify as small espresso machines, but their footprints vary. The most compact option measures less than 6 inches wide, fitting into tight kitchen corners or dorm counters. The mid-size machine occupies roughly 9 inches of counter width, while the largest of the three still stays under 12 inches - compact compared to traditional espresso setups, but noticeably bigger if counter real estate is scarce. Height and depth matter too; machines with taller water reservoirs or protruding portafilters need clearance above and in front.
Ease of use and control: Beginner-friendly design shows up in button layouts, portafilter handling, and feedback. The simplest machine uses a single button and pre-set pressure, removing guesswork but offering limited customization. The mid-range option adds manual pressure control, letting you influence extraction without requiring barista training. The most feature-rich machine includes programmable shot volume and temperature settings, which add flexibility but also a learning curve. All three use standard 51mm or 58mm portafilters, but basket size and tamping consistency affect how forgiving each machine is when you're still dialing in grind and dose.
Pressure and brew quality: Real espresso requires sustained pressure - typically 9 bars or close to it. The manual lever machine builds pressure through your pump action, giving you direct control but demanding consistent technique. The electric pump models hit their rated pressure automatically, producing more repeatable shots once you've settled on grind size and dose. Brew temperature stability varies: the machine with a larger boiler holds temperature better across back-to-back shots, while smaller thermal blocks heat faster but may fluctuate slightly between pulls. These differences become obvious when you're pulling multiple drinks in a row.
Milk frothing capability: If you want lattes or cappuccinos, frothing matters. One machine includes a steam wand but with limited steam pressure, suitable for small amounts of milk but slower than café-grade steamers. Another uses a manual frother attachment, which works but requires practice and patience. The third machine offers no built-in frothing, keeping the design minimal; you'll need a separate milk frother if you want anything beyond straight espresso or americanos.
Price and performance tradeoffs: The least expensive machine delivers genuine espresso at the cost of manual effort and slower workflow. The mid-priced option automates pressure and heating, speeding up your routine without a dramatic price jump. The higher-end model adds programmability and better temperature control, justified if you plan to pull multiple shots daily and want more consistency. All three produce espresso that tastes recognizably different from drip coffee or pod machines, but the pricier models reduce trial-and-error and make it easier to repeat good results.
Your choice depends on which constraints matter most: if space is tight, the narrowest machine wins. If you want the shortest path to consistent shots, the automated pump and temperature controls help. If you enjoy hands-on brewing and want to minimize cost, the manual lever machine rewards practice. None of these machines require professional skill, but each asks you to prioritize differently among size, simplicity, and control.
Essential Accessories You'll Actually Need (and What to Skip)
When you're just starting out, it's tempting to buy every espresso gadget you see online. But most beginners need only three things: a tamper, a descaling solution, and - if you plan to froth milk - a small stainless steel pitcher.
A tamper is essential because the cheap plastic one that ships with most machines rarely applies even pressure, which leads to uneven extraction and bitter shots. Look for a 51mm or 58mm tamper (depending on your portafilter size) with a flat base and comfortable handle. You don't need a calibrated or precision-turned model yet; a basic stainless steel tamper will do the job.
Descaling solution keeps your machine running smoothly and prevents mineral buildup that shortens pump life and affects water flow. Use it every one to three months depending on your water hardness. Many manufacturers recommend a specific brand, but any citric-acid-based descaler formulated for espresso machines works well.
If you want to steam milk for lattes or cappuccinos, a 12-ounce stainless steel frothing pitcher gives you enough room to create a vortex without overflow. Stainless steel conducts heat evenly, so you can feel the temperature rise as you steam. Avoid oversized pitchers - they make it harder to control the milk for a single serving.
Beyond these three, a dosing funnel can be helpful if you find yourself spilling grounds around the portafilter, but it's not critical at first. A knock box is convenient for disposing of spent pucks, though a small bowl or the trash works fine while you're learning. A distribution tool (WDT tool) or puck screen may improve consistency, but they add complexity and cost without solving fundamental technique issues that practice will fix on its own.
Skip the bottomless portafilter, precision scales, and flow-control mods until you can pull consistent shots with your stock setup. These upgrades shine once you understand what you're trying to improve. For now, keep your investment small, focus on dialing in your grind and tamp, and add accessories only when a specific limitation becomes obvious.
Final Verdict: How to Choose the Right Machine for You
Choosing the right small espresso machine comes down to four key factors: your budget, how much control you want over the brewing process, your available counter space, and your willingness to learn a few basic techniques.
If you're working with a tight budget and want something that will get you started without a steep learning curve, the Queyd delivers surprisingly good espresso for the price. You'll need to be patient with the pressure-building process and understand that consistency takes practice, but it's a solid entry point that won't leave you wondering if you wasted your money.
For those who want maximum simplicity and are willing to trade some flexibility for convenience, the Lavazza A Modo Mio Jolie Plus is the answer. Pop in a pod, press a button, and you're done. The espresso quality is reliable, cleanup is minimal, and there's essentially no learning curve. Just be prepared for the ongoing cost of pods and the fact that you're locked into one ecosystem.
The LERTIN espresso machine strikes the best overall balance for most beginners. It gives you real control over your shots through the pressurized portafilter, includes a capable steam wand for milk drinks, and comes with useful accessories like a tamper and measuring spoon. The compact footprint fits comfortably on most counters, and while you'll need to spend a few sessions getting your technique down, the machine rewards that effort with consistently good espresso. It's the option that will grow with you as your skills improve without overwhelming you on day one.
Think about what matters most to you: if it's convenience above all else, go with pods. If it's value and you're comfortable with a bit of unpredictability, the Queyd will serve you well. But if you want a machine that balances ease of use with room to learn and improve, the LERTIN is the machine that will make you feel like you made the right choice six months from now.
Whichever machine you choose, remember that good espresso at home is as much about the coffee you use and how you prepare it as it is about the machine itself. Start with fresh, properly ground beans, give yourself permission to pull a few mediocre shots while you learn, and enjoy the process. The best small espresso machine for a beginner is the one that makes you excited to use it every morning.
What to Look For in a Beginner-Friendly Espresso Machine
- Compact footprint that fits small counters and tight kitchens
- Simple controls with clear pressure or brew indicators
- Built-in milk frother or steam wand for cappuccinos and lattes
- Fast heat-up time so you're not waiting around
- Easy-to-clean components and accessible water reservoir
- Affordable price point that won't punish first-time mistakes