If you've been spending $5 to $7 on café espresso drinks several times a week, the numbers add up quickly - often $100 or more each month. That money buys convenience, but it doesn't give you control over quality, timing, or the satisfaction of making something yourself. A home espresso machine can change that equation, delivering café-quality shots in your own kitchen and paying for itself within months if you're a regular drinker.
The challenge is knowing what to look for when buying an espresso machine. Walk into a store or browse online, and you'll find machines ranging from $100 semi-automatics to $3,000 dual-boiler units, each with different heating systems, portafilter styles, and grinder requirements. Without a clear framework, it's easy to overspend on features you don't need or underspend and end up frustrated with inconsistent results.
This guide cuts through the confusion. We'll walk you through the core machine types, explain why the grinder matters as much as the machine itself, clarify the difference between pressurized and non-pressurized portafilters, compare heating systems, and outline realistic budgets for beginners. By the end, you'll understand which features align with your taste expectations and daily routine, so you can invest confidently and avoid the most common mistakes first-time buyers make.
Semi-Automatic vs. Super-Automatic: Which Type Fits Your Lifestyle?
When buying an espresso machine, the first fork in the road is choosing between semi-automatic and super-automatic models. This decision shapes your daily routine, learning curve, and budget more than any other feature.
Semi-automatic machines give you hands-on control. You grind the coffee, dose and tamp it into the portafilter, start and stop the shot manually, and steam your own milk. This approach demands practice - dialing in grind size, mastering tamping pressure, and learning milk texture takes time - but rewards you with flexibility. You can adjust every variable to suit different beans or drinks. Semi-automatics also cost less upfront, with capable entry-level models starting well below the price of super-automatics. The trade-off is clear: you invest time and attention in exchange for control and lower cost.
Super-automatic machines handle nearly everything at the push of a button. Built-in grinders dose and tamp automatically, programmable shot volumes eliminate guesswork, and integrated milk systems froth and pour without your intervention. This convenience comes at a premium - super-automatics typically cost significantly more than semi-automatics with comparable build quality. They also offer less room to experiment: you're working within the machine's programmed parameters, and swapping beans or tweaking technique is less transparent. Maintenance can be more complex, too, since internal grinders and milk systems require regular cleaning cycles.
The right choice depends on how you'll use the machine. If you enjoy the ritual of making coffee, want to develop barista skills, or prefer to control each step, a semi-automatic fits. If you prioritize speed on busy mornings, want consistent results without a learning curve, or make multiple drinks back-to-back for family or guests, a super-automatic makes sense. Budget matters, but so does temperament: a capable semi-automatic in the hands of someone who enjoys the process will outperform a super-automatic used by someone who resents the lack of control.
Neither type is objectively better. Semi-automatics reward engagement and offer a lower entry cost; super-automatics trade money and some flexibility for convenience and consistency. Clarify your priorities - time, interest in technique, and budget - before you shop, and the choice becomes straightforward.
The Grinder: Why a Separate, Quality Grinder is Crucial
The single biggest mistake first-time espresso buyers make is spending their entire budget on the machine and settling for a blade grinder - or worse, pre-ground coffee. The truth is, grind quality influences extraction more than the machine itself. Even a modest espresso machine will produce disappointing shots if the grind is inconsistent or stale.
Built-in grinders on entry-level combo machines are typically inadequate. They often use low-quality burrs or blade mechanisms that produce uneven particle sizes, leading to bitter, under-extracted, or sour espresso. A separate burr grinder gives you control over grind size, consistency, and freshness - three factors that directly shape flavor and crema.
Burr grinders crush beans between two abrasive surfaces, delivering uniform particle size. Blade grinders chop randomly, creating a mix of dust and boulders that clogs the portafilter and extracts unevenly. For espresso, this difference is not subtle.
When planning your budget, allocate at least as much for the grinder as you do for the machine. A $300 machine paired with a $200 burr grinder will outperform a $500 machine with a $30 blade grinder every time. Look for grinders with stepless or micro-step adjustment, which let you dial in shots with precision as you learn.
If you're comparing grinder options or need help choosing your first burr grinder, our beginner grinder guide walks through grind settings, burr types, and realistic expectations at each price tier.
Understanding the Portafilter: Pressurized vs. Non-Pressurized Baskets
The portafilter basket is where ground coffee meets pressurized water, and the type of basket your machine uses has a surprising impact on your espresso quality and learning curve. Most entry-level machines ship with pressurized baskets, while enthusiast models favor non-pressurized baskets. Understanding the difference helps you choose a machine that matches your skill level and goals.
Pressurized baskets have a single small hole at the bottom and a false floor inside. Water builds up pressure above the coffee puck, forcing it through that tiny exit to create crema - even when your grind is inconsistent or your tamping technique is shaky. Think of them as training wheels: they make it easier to pull a drinkable shot without dialing in grind size or mastering distribution. The tradeoff is that the artificial pressure masks flavor nuances and produces thicker, less complex crema that doesn't reflect true extraction quality.
Non-pressurized baskets (also called single-wall or commercial-style baskets) have many small holes across the entire bottom. Water flows directly through the coffee without artificial pressure buildup, which means grind size, dose, distribution, and tamp all matter immediately. When you get it right, non-pressurized baskets deliver richer flavor, balanced extraction, and silky crema that tells you how your shot pulled. The learning curve is steeper - poor grind or technique results in gushing or choking - but this feedback loop is exactly how you improve.
For beginners buying their first espresso machine, look for models that either include both basket types or use standard 58mm portafilters that accept aftermarket baskets. Starting with a pressurized basket lets you enjoy espresso while you learn grinder settings and technique. Once you can pull consistent shots, swapping to a non-pressurized basket unlocks better flavor and true control. Machines that lock you into proprietary pressurized systems limit your growth, while those supporting easy basket changes give you a clear upgrade path without replacing the entire machine.
If you're serious about learning espresso, plan to transition to non-pressurized baskets within a few months. Pair this with a capable grinder that offers fine, repeatable adjustments, and you'll have the tools to move beyond beginner shots into genuinely satisfying espresso at home.
Heating Systems Explained: Thermoblock vs. Single Boiler
The heating system is the heart of your espresso machine, and understanding the difference between thermoblock and single boiler designs will help you set realistic expectations for your workflow.
A thermoblock uses a coiled heat exchanger that warms water on demand as it passes through. The main advantage is speed - these machines heat up in 30 to 90 seconds, making them convenient for quick morning shots. The tradeoff is temperature stability. Thermoblocks can struggle to maintain consistent brew temperature shot after shot, especially when pushed hard. They're common in budget machines under $300 and work well if you're making one or two drinks at a time without rushing.
A single boiler heats a reservoir of water to brewing temperature, then switches to steam temperature when you activate the steam wand. This design offers better thermal stability during extraction, which translates to more consistent flavor. The downside is workflow: you'll brew your shot, wait 30 to 60 seconds for the boiler to heat up for steaming, then wait again for it to cool back down if you want to pull another shot. Single boilers are typical in the $300 to $600 range and suit anyone who values shot quality over speed.
Dual boiler machines solve the wait by dedicating one boiler to brewing and another to steam, but they typically start around $1,200 and sit outside most beginner budgets. For your first machine, expect to choose between the convenience of a thermoblock and the consistency of a single boiler based on how you plan to use it daily.
If you make a single cappuccino each morning and value quick warm-up, a thermoblock will serve you fine. If you're brewing back-to-back drinks or care deeply about dialing in repeatable shots, a single boiler is worth the slower rhythm. Both systems can make good espresso - your choice comes down to whether speed or stability matters more in your routine.
The Steam Wand: What to Look for to Make Great Milk Drinks
If you plan to make cappuccinos, lattes, or other milk-based drinks, the steam wand becomes one of the most important features on your espresso machine. Not all steam wands are created equal, and the type you choose will directly affect the texture and quality of your milk foam.
There are two main steam wand designs you'll encounter. Panarello-style wands feature an external sleeve that automatically aerates the milk by mixing in air. These are beginner-friendly and produce foam quickly, but the result is usually larger, coarser bubbles rather than the silky microfoam preferred for latte art. You'll have less control over texture, and the foam tends to separate faster.
Traditional steam wands are simple metal tubes without the automatic aeration sleeve. They require more technique - you control the angle, depth, and positioning to create the vortex that textures the milk. The learning curve is steeper, but once you develop the skill, you can produce dense, creamy microfoam with tiny bubbles that integrate smoothly into espresso.
Beyond wand type, look for machines with articulating or ball-joint steam wands that swivel and tilt. This adjustability makes it much easier to position your pitcher at the right angle without awkward hand positions or moving the machine itself. Fixed wands can be frustrating, especially if you're using different pitcher sizes.
Steam power and recovery time also matter. Single-boiler machines require you to switch from brewing mode to steam mode, and you'll wait for the boiler to heat up. Dual-boiler and heat-exchanger machines offer faster steam with less downtime, which is helpful if you're making multiple milk drinks back-to-back. Thermoblock machines can vary - some steam well, others produce weak or inconsistent pressure.
If milk drinks are a priority, prioritize a machine with a traditional steam wand and enough steam pressure to texture milk in under a minute. Panarello wands work in a pinch, but many users remove the sleeve later to gain more control. Check reviews or specifications to confirm steam pressure, especially on budget machines where steam performance is often the first compromise.
Setting a Realistic Budget: What to Expect at Entry-Level vs. Mid-Range
Budget is often the biggest question for first-time buyers, and understanding what each price tier delivers will help you avoid disappointment or overspending. Espresso machines span from under $100 to several thousand dollars, but most beginners will land in one of three zones: entry-level, mid-range, or high-end.
Entry-level machines ($100 - $200) typically use thermoblock heating, pressurized portafilter baskets, and steam wands with limited power. These machines can produce drinkable espresso-style drinks and are useful for learning the basics, but they often require patience. Expect plastic construction, slower heat-up times, and less control over temperature and pressure. Many buyers in this range upgrade within a year as their palate and expectations grow. If you choose this tier, plan to invest in a capable grinder separately - skimping on the grinder will limit what any machine can do.
Mid-range machines ($300 - $600) represent a significant step up in build quality, consistency, and capability. At this level, you'll find stainless steel boilers, better temperature stability, and portafilters that accept non-pressurized baskets. Steam wands are more responsive, and many models include basic pressure gauges or pre-infusion features. These machines are better suited to growth: they reward technique improvements and pair well with a decent grinder. Longevity is better, and the day-to-day experience feels more predictable. This is the sweet spot for most beginners who are serious about espresso but not ready to commit to prosumer equipment.
High-end home machines ($700 and up) bring dual boilers, PID temperature control, rotary pumps, and commercial-grade components. They eliminate waiting between shots and steaming, offer precise control, and are built to last years of daily use. However, they also demand more from the user - better technique, careful maintenance, and a grinder that can keep pace. For most first-time buyers, this tier makes sense only if you're certain espresso will be a long-term pursuit or if you're replacing an outgrown starter machine.
Regardless of price tier, remember that the grinder is not optional. A capable burr grinder will cost $100 - $300 for entry-level electric models, or $50 - $150 for quality hand grinders. Pairing a $150 machine with a $40 blade grinder will yield worse results than a $100 machine with a $100 burr grinder. Budget for both from the start.
Set your expectations to match your investment. Entry-level machines require compromise and patience but can teach you the fundamentals. Mid-range machines offer a better foundation for growth and a more enjoyable daily routine. High-end machines deliver control and consistency but assume you've already developed your skills. Choose the tier that fits your budget and commitment level, and plan your grinder investment accordingly.
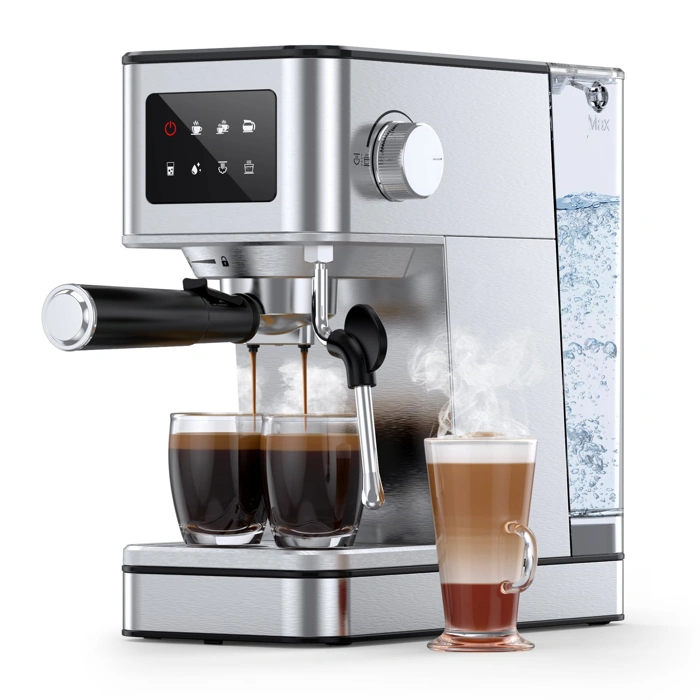
20 Bar Touch Screen Espresso Machine
The 20 Bar Touch Screen Espresso Machine offers an entry point for first-time buyers at $109.98. This machine illustrates what budget-friendly features look like: a touch screen interface that simplifies operation, 20 bar pressure capability, and a price that won't require a major commitment before you know whether manual espresso is right for you.
At this price, expect trade-offs. Temperature control will be limited compared to machines with PID controllers, and the portafilter likely uses pressurized baskets rather than traditional baskets - which means less control over extraction but more forgiving results when you're still learning. The 20 bar pressure rating is typical for pump-driven entry machines; practical extraction happens around 9 bar, so this spec indicates the pump's maximum capacity rather than operating pressure.
This machine does not include a grinder. You'll need to budget separately for one or plan to use pre-ground coffee initially, knowing that grind quality will limit your results. For someone willing to learn and experiment without a large upfront investment, this represents a realistic starting option. Just understand that upgrading your grinder will matter more to your shot quality than the machine itself once you move past the basics.
If you're comparing machines in this range, focus on the included accessories, ease of cleaning, and whether the water reservoir and drip tray are simple to access. The touch screen interface here may feel more intuitive than button panels on similarly priced models, but the core brewing performance will be comparable across budget pumps.
- ✅ Accessible $109.98 price for beginners
- ✅ Touch screen interface simplifies controls
- ✅ 20 bar pump suitable for espresso extraction
- ⚠️ No grinder included - separate purchase required
- ⚠️ Limited temperature control compared to PID-equipped machines
- ⚠️ Likely uses pressurized baskets with less extraction control
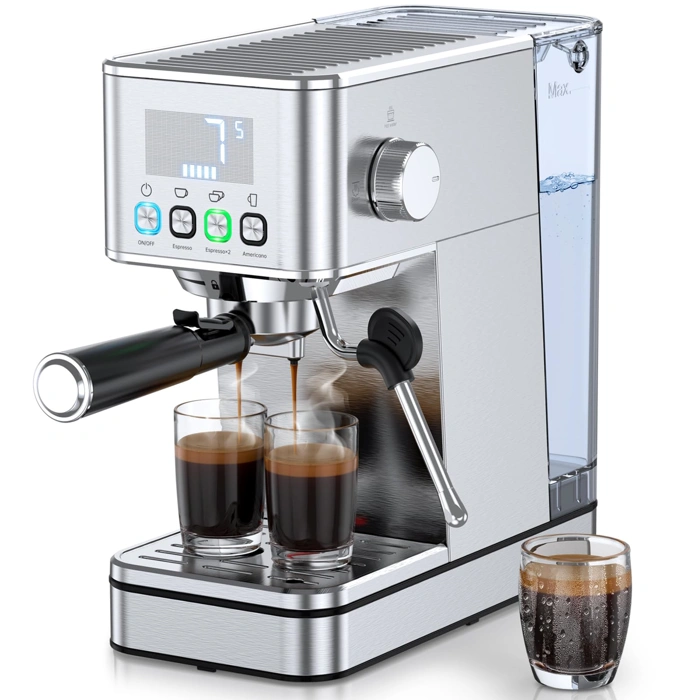
Compact 20 Bar Espresso Machine with Steam Frother, 57.5oz Tank, Touch Screen
This compact 20 bar espresso machine fits into small kitchens and limited counter spaces without demanding much real estate. The 57.5-ounce water tank holds enough for several drinks before refilling, which is convenient when you're making lattes for yourself and a guest. A built-in steam frother lets you texture milk, and the touch screen interface simplifies navigation between brewing and steaming modes.
At $89.99, this machine serves as an accessible entry point for home espresso. It carries a 4.4 out of 5 rating and is currently in stock. The compact footprint and larger-than-expected reservoir make it practical for daily use in apartments or tight kitchens where counter space is at a premium.
Expect this machine to handle morning routines and casual latte practice, but understand it won't deliver the consistency or durability that serious enthusiasts look for in long-term equipment. The 20 bar pressure specification and touch screen are nice features at this price, yet the overall build and component quality reflect the budget tier. If you're exploring espresso without committing to a high-end setup, this offers a functional way to learn milk steaming and shot pulling in a small package. For those planning to pull multiple back-to-back drinks or chase café-level precision, a more robust machine will be necessary down the road.
- ✅ Compact footprint suits small kitchens and limited counter space
- ✅ 57.5 oz water tank reduces refill frequency
- ✅ Touch screen interface simplifies operation
- ✅ Built-in steam frother for milk texturing
- ✅ Budget-friendly entry point at $89.99
- ⚠️ Build and component quality reflect budget tier
- ⚠️ Not designed for serious enthusiasts or long-term use
- ⚠️ Consistency and durability less reliable than higher-end machines
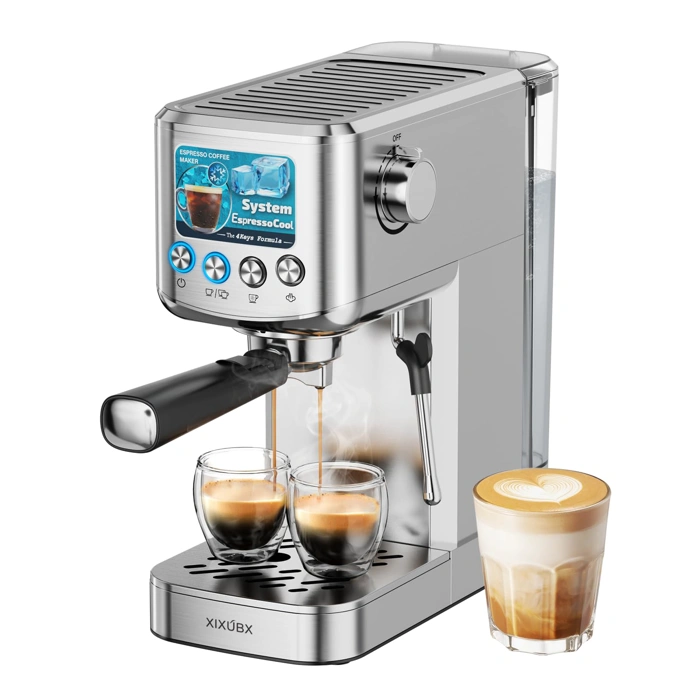
XIXUBX 20 Bar Stainless Steel Espresso Machine with Milk Frother, 42 oz Tank
The XIXUBX 20 Bar Stainless Steel Espresso Machine offers a step up in build quality for buyers who want something more durable than all-plastic models but aren't ready to spend several hundred dollars. Priced at $89.98, it features stainless steel housing that should hold up better to daily use and kitchen wear compared to lighter construction materials in this price range.
The 42 oz water tank provides enough capacity for multiple drinks without constant refilling - useful if you're making coffee for two or planning back-to-back shots and milk drinks. The included milk frother lets you experiment with lattes and cappuccinos right away, which is a practical addition for beginners exploring milk-based espresso drinks.
While the stainless steel construction improves aesthetics and potential longevity, this is still an entry-level machine in terms of performance. The 20 bar pressure rating is standard for pumps in this category, but shot quality will depend heavily on grind consistency, dose accuracy, and technique. If you're using pre-ground coffee or an inconsistent grinder, results will remain unpredictable regardless of the machine's build materials.
This model makes sense for someone who values a more solid feel and cleaner appearance on the countertop while staying within a modest budget. Just remember that investing in a capable burr grinder - often $multiple to $multiple or more - remains the most important step for improving your espresso, even with a better-built machine like this one.
- ✅ Stainless steel housing offers better durability than plastic alternatives
- ✅ 42 oz water tank reduces refill frequency
- ✅ Includes milk frother for experimenting with milk drinks
- ✅ Budget-friendly at $89.98
- ⚠️ Entry-level performance still requires quality grinder for consistent shots
- ⚠️ Build upgrade does not eliminate technique learning curve
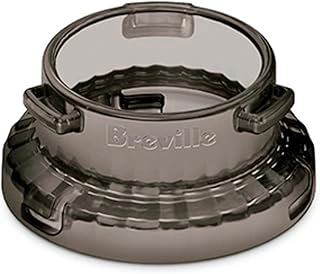
Breville 54mm Dosing Funnel for Barista & Bambino Espresso Machines
Once you've chosen your espresso machine and grinder, small accessories can make a noticeable difference in your daily workflow. The Breville 54mm Dosing Funnel is one of those practical upgrades that addresses a common beginner frustration: coffee grounds spilling onto your counter during loading and distribution.
This funnel sits on top of your portafilter basket, creating a taller rim that contains the grounds as you dose from the grinder and use distribution tools. It's designed specifically for Breville's 54mm portafilter system, which is found on popular models like the Barista Express, Barista Pro, Bambino, and Bambino Plus.
For new espresso users still refining their dosing and tamping technique, the funnel provides a cleaner, less stressful workspace. You can shake or tap the portafilter to settle grounds, use a distribution tool, or simply load a bit more deliberately without worrying about cleanup. The funnel removes easily once you're ready to tamp and brew.
At $19.95, it's an inexpensive addition that improves the usability of your setup without adding complexity. If you find yourself sweeping up stray grounds after every shot, this accessory offers a straightforward solution that keeps your counter and workflow tidier from the start.
- ✅ Prevents coffee grounds from spilling during dosing and distribution
- ✅ Designed for Breville 54mm portafilters (Barista Express, Pro, Bambino models)
- ✅ Makes learning dosing and tamping less messy for beginners
- ✅ Inexpensive upgrade at $19.95
- ✅ Easy to remove before tamping and brewing
- ⚠️ Only compatible with Breville 54mm portafilter system
- ⚠️ Does not improve grind quality or extraction, only workflow cleanliness
Key Takeaways: A Checklist for Making Your Final Decision
- Decide if you want semi-automatic control or super-automatic convenience
- Budget for both machine and a quality burr grinder - don't skip the grinder
- Look for machines that support non-pressurized baskets or easy upgrades
- Choose a heating system that matches your patience: thermoblock for speed, boiler for stability
- Check steam wand type - traditional wands give better milk texture than panarello
- Set a realistic budget: entry-level works but requires learning; mid-range offers better experience